How to install adb drivers on windows
Содержание:
Инструкция: Как управлять Android с ПК на Windows
Что делать если вы случайно уронили и разбили дисплей своего Android устройства, а данные хранящиеся на нем вам крайне важны?!
Несмотря на большое разнообразие противоударных чехлов и защитных пленок/стекол для смартфонов и планшетов на Android, случается такое, что экран после падения разбивается и никак не реагирует на нажатия. Стоимость ремонта не всегда дешевая, особенно у современных моделей смартфонов, а вам как назло понадобились данные хранящиеся на смартфоне? Не беда, мы подробно расскажем об основных способах, которые помогут вам «выдернуть» все самое необходимое без каких-либо затрат и походов в СЦ.
Сразу хотим предупредить, что данная статья подойдет для пользователей, чье устройство не реагирует на нажатия, но при этом отображает информацию на дисплее.
Способ первый (простой)
Если вы не знаете, что такое Root-права и никогда в жизни не устанавливали их на свое устройство, то данный метод рассчитан именно для вас. Проблема с восстановлением данных решается буквально в считанные минуты.
Способ второй (простой)
Для второго способа вам понадобиться кабель USB OTG или же компьютерная мышь с разъемом microUSB. Правда, стоит отметить, что не все девайсы способны корректно работать/вообще работать через кабель USB OTG.
Что вам понадобится:
- Кабель USB OTG/мышь с разъемом microUSB
- Смартфон/планшет с разбитым дисплеем
- Мышка и немного свободного времени
Все, что нам нужно сделать – это подключить компьютерную мышь к своему устройству и уже после управлять им с помощью мышки, перенося данные, контакты и прочую информацию с помощью карты памяти или же соответствующих приложений, к примеру, AirDroid.
Способ третий (для опытных)
Данный способ подойдет для всех пользователей, но для его осуществления необходимы некоторые детали, описанные ниже.
- Персональный компьютер/ноутбук с установленной Windows
- USB кабель для подключения устройства к ПК
- Заранее установленные драйвера для Android
- Включенный режим отладки по USB
- Скачанная и установленная программа ADB Run
Как вывести изображения смартфона/планшета на дисплей ПК:
1. Запускаем установленный ADB Run. 2. При помощи цифры «7» переходим в пункт Manual Command and Unlock Bootloader далее вводим цифру «9» и попадем в раздел Control Android out Windows, после нажимаем цифру «1» Go to Website Java (Download Java JDK, and install) и переходим на сайт Java для установки пакета Java JDK.
3. На сайте Java JDK вам необходимо скачать самую последнюю версию Java, учитывая разрядность операционной системы Windows.
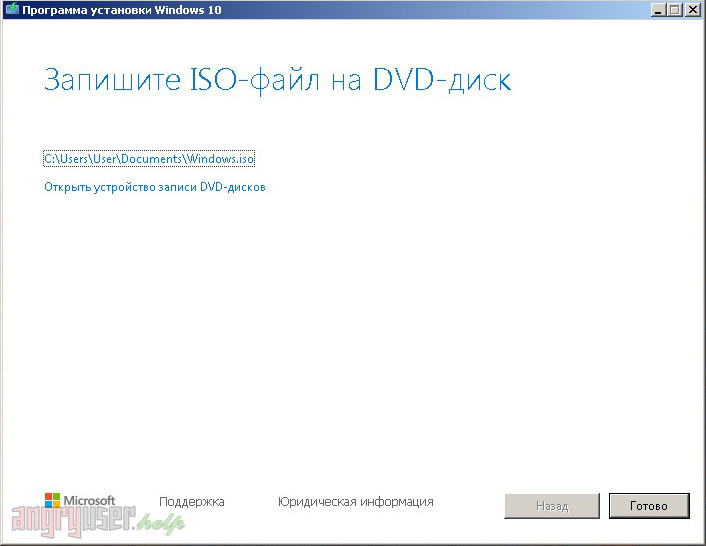
4. После того, как вы установите Java SDK, необходимо выбрать пункт Run Control Android out Windows и указать путь до файла Java, как показано на рисунке ниже (версия SDK может отличаться, смотрите внимательно!).
5. Если все действия будут выполнены, верно, то вы увидите окно с изображением рабочего стола вашего устройства, а в качестве управления выступает компьютерная мышь.
Такими весьма простыми способами вы сможете в течение пары минут «выдернуть» все нужные вам данные с устройства с разбитым дисплеем.
How to install ADB Drivers on Windows OS
Read the instructions given below to manually install ADB and Fastboot drivers on Windows XP, Windows Vista, Windows 7, Windows 8/8.1, Windows 10 32-bit, or 64-bit operating system. If you face any problem, then confirm the latest mobile drivers are installed on your computer or not.
Requirements
- Ensure to connect your Android device to PC via USB cable.
- Also enable USB debugging mode on your phone.
- Moreover, install the latest USB drivers on your PC.
Method 1: Using 15 seconds ADB Installer
Developed by Snoop05, this is an all in one ADB installer tool for Android. As its name suggests, this tool installs ADB, Fastboot, and Google drivers on your computer within 15 seconds. All you need to do is launch this tool on your PC and follow the instructions given.
15 seconds ADB Installer.
Steps to install ADB Drivers
- Download and extract 15 seconds ADB Installer on your PC.
- Launch the 15 seconds ADB Installer.
- To install ADB and Fastboot, type Y and press the enter key.
- Then to install ADB System-wide, again type Y and press enter.
- Now it’ll ask to install device drivers. Again type Y and press enter.
- This will launch the Device driver installation wizard. Press next to install the device drivers.
- That’s it! You’ve successfully installed ADB drivers using 15 seconds ADB Installer.
Method 2: Using Minimal ADB and Fastboot Setup wizard
Shimp208, a recognized contributor from XDA developers has compiled this setup wizard. Its main purpose is to install ADB drivers without having to enter any keys like in the previous method. Besides, the total installation of Minimal ADB and Fastboot is around 2 MB in size, thus making it very lightweight.
Steps to install ADB Drivers
- Download and Extract Minimal ADB and Fastboot Tool on your PC.
- Launch it by giving Administrator privileges.
- The installation Setup wizard will open as given below.
- Read out the instructions and click Next to continue.
- Furthermore, click on the Install option to begin the installation process.
- As soon as you click on Install, the Minimal ADB and Fastboot installation process will start.
- Finally, the Minimal ADB and Fastboot drivers will be successfully installed on your computer.
Method 3: Using ADB Driver Installer
ADB Driver Installer provides Universal Android ADB USB compatible drivers for Windows operating system.
Steps to install ADB Drivers
- Download and Extract ADB Driver Installer on your computer.
- Then right-click and run it as Administrator.
- Ensure that your Android device is connected to a PC with USB debugging enabled.
- As soon as you launch the ADB Driver Installer, the following screen will appear:
- The device status shows that the drivers are incorrectly installed. So we need to fix this.
- For that click on the Install option. This will begin the installation of ADB and Fastboot drivers on your PC.
If you are prompted Windows can’t verify the publisher of this driver software, select Install this driver software anyway option.
- This will start the installation of the Universal Android USB driver.
- Finally, the installation will complete a successful message.
Steps to install ADB Drivers
- Download and Extract the SDK Platform-tools zip file on your PC.
- After extraction, you’ll see a folder named Platform tools.
- Move this folder to an easily accessible folder such as C:\adb.
- In that folder, open a cmd window.
- For doing so, hold the Shift button and right mouse click anywhere in that folder. You’ll see a list of options from which select the Open command window here option. This will launch the command prompt window as given below.
To confirm the proper installation of ADB drivers, type the following command, and press the enter key.
- As soon as you press the enter key, you’ll see a message saying ‘List of devices attached’ along with some random numbers.
- Moreover, this will confirm the successful connection of your device with the PC using ADB drivers.
Note: If such a thing doesn’t happen, then install USB drivers, enable USB debugging mode, and try again. If the problem persists, try changing the USB cable or even the USB port.
What is ADB?
Android Debug Bridge or ADB is a client-server program that lets you communicate with a device. ADB is a part of the Android Software Development Kit (SDK). Moreover, it includes three components viz. a client, a server, and a daemon.
Besides, a client is the one who runs on your development machine and sends a command. On the other hand, a daemon is the one that runs as a background process on your android device.
And lastly, the communication between the client and daemon is managed by a Server. This communication is most often done over a USB cable, but WiFi connections are also supported.
ADB can control your Android device over USB from a computer, transfer files, install apps, uninstall apps, run powerful shell commands, etc. As long as debugging mode is enabled on your Android device, you can send ADB commands from a computer.
Most important, the ADB commands can even work when your Android device is booted into recovery mode. Moreover, the best part is that your device doesn’t even need to be rooted in the ADB commands to work.
Whats is Fastboot?
Fastboot is a protocol that is used to update the flash file system in Android devices. Additionally, this tool works as an alternative to the recovery mode for implementing updates and installations.
When your device is booted in Fastboot mode, you can easily modify the file system images from the PC over a USB connection. Not all phones have a Fastboot mode that the user can access.
However, for few phones like Nexus, Fastboot is on by default by developers. In this guide, we’ll discuss a step by step procedure on how to install ADB drivers on Windows.
Most importantly, the guide given below is applicable for every Android device including Samsung, Google, Sony, Motorola, Lenovo, One Plus, Oppo, Vivo, Huawei, LG, HTC, Nokia, Xiaomi, etc.
Команды ADB
Перед выполнением команд adb полезно знать, какие экземпляры устройств подключены к серверу adb. Список подключенных устройств можно посмотреть следующей командой.
В ответ adb выведет серийный номер, состояние и описание (параметр -l) подключенных устройств.
В примере ниже показаны три устройства. Первые два — эмуляторы, третье — аппаратное устройство, подключенное к компьютеру.
Если запущен только один эмулятор или подключено только одно устройство, команда adb отправится на это устройство по умолчанию. Если же запущено несколько эмуляторов и / или устройств, необходимо использовать параметры -d, -e или -s, чтобы указать устройство, на которое должна быть направлена команда.
Нижеприведенная команда отправится на устройство с указанным серийным номером.
Команда отправится только на устройство подключенное через USB. Выдаст ошибку, если подключено больше одного устройства.
Команда отправится на устройство в эмуляторе. Выдаст ошибку, если подключено больше одного эмулятора.
Подсоединиться к андроид хосту по протоколу TCP/IP (по умолчанию порт 5555, если не указан другой).
Отсоединиться от андроид подключенного через TCP/IP (по умолчанию порт 5555). Если не задан ни один параметр, отключиться от всех активных соединений.
Перезапуск демона с правами root.
В некоторых случаях может потребоваться остановить сервер adb, и перезапустить его, чтобы решить проблему (например, если adb не отвечает на команды).
Остановить сервер.
Запустить сервер.
Копировать файл или папку на устройство.
Например,
Копировать файл или папку с устройства на компьютер.
Копировать с компьютера на устройство только новые файлы. С ключом -l не копировать, только создать список.
Установить приложение на устройство.
Например,
Ключи:-l блокировка приложения;-r переустановить приложение, с сохранением данных;-s установить приложение на карту памяти.
Чтобы удалить приложение с устройства используйте следующую команду.
Ключ -k означает, не удалять сохраненные данные приложения и пользователя.
Сделать скриншот экрана устройства.
Полученный скриншот можно сразу забрать на компьютер.
Для записи видео с экрана устройства используйте команду screenrecord.
или с параметрами
Чтобы остановить запись используйте комбинацию клавиш Control + C (Command + C на Mac). По умолчанию максимальный лимит для видео составляет 3 минуты.
С полным списком команд adb можно ознакомиться на сайте .